傳統機器學習模型(實驗性質)#
了解如何使用 Xinference 推理傳統機器學習模型。在 Xinference 中,這些靈活且可擴展的模型被稱為 靈活模型。
在 v1.7.1 版被加入: 此功能自 v1.7.1 版本起公開,目前 API 尚不穩定,可能會在後續迭代中發生變化。
Introduction#
傳統機器學習模型在以大模型為核心的生態系統中仍然能發揮重要作用。
Xinference 提供了靈活的擴展能力,用於推理傳統機器學習模型。它內建支援載入和執行以下類型的模型:
使用 HuggingFace 託管模型的 HuggingFace Pipeline,可用於分類等任務。
使用 ModelScope 上模型的 ModelScope Pipeline,可用於分類等任務。
YOLO 用於圖像檢測及相關電腦視覺任務。
Xinference 支援多種傳統機器學習模型。針對上述每個類別,我們將透過一個代表性範例,逐步演示如何在 Xinference 平台上進行推理。
內建模型支援案例#
HuggingFace Pipeline 模型#
首先,我們以 FacebookAI/roberta-large-mnli 為例。該模型屬於零樣本分類模型。對於其他類型的模型,註冊時只需指定對應的任務(也就是 Pipeline 的參數)。
將模型下載到以下路徑:
/path/to/roberta-large-mnli
接下來,我們示範如何在 Xinference Web UI 中註冊該靈活模型。後續範例中,除非必要,我們將跳過介面操作,專注於核心邏輯。
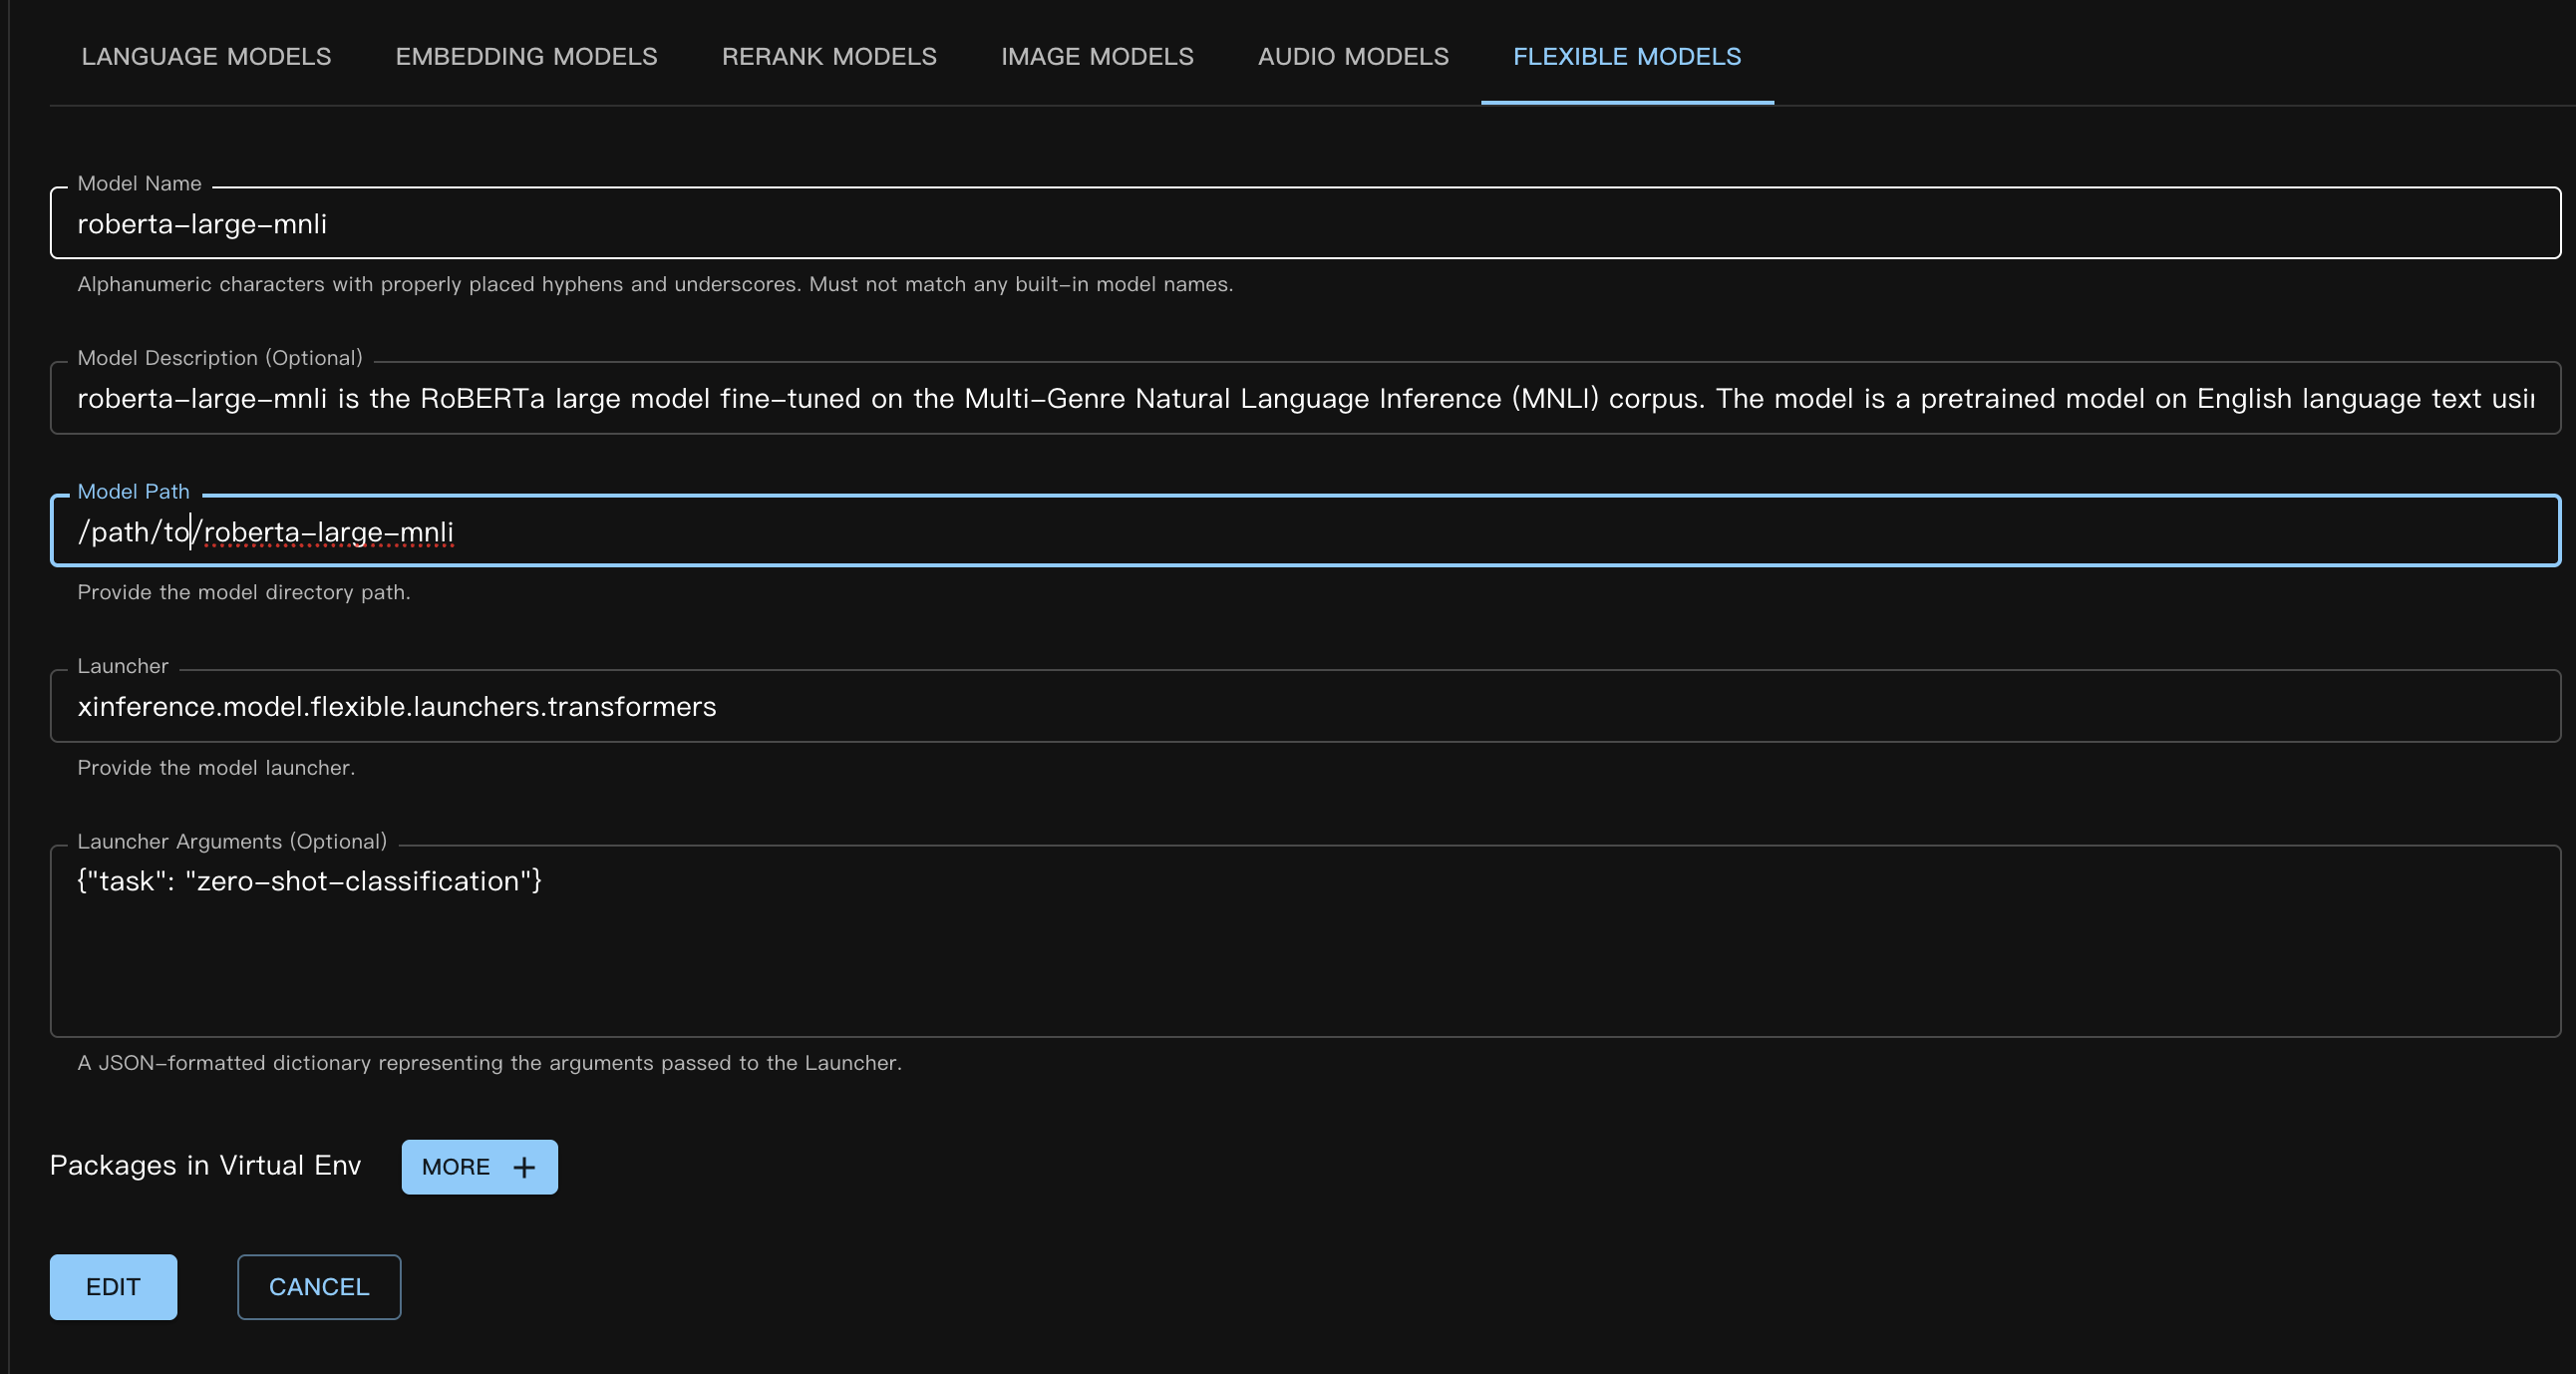
對應的自訂模型 JSON 檔案如下:
{
    "model_name": "roberta-large-mnli",
    "model_id": null,
    "model_revision": null,
    "model_hub": "huggingface",
    "model_description": "roberta-large-mnli is the RoBERTa large model fine-tuned on the Multi-Genre Natural Language Inference (MNLI) corpus. The model is a pretrained model on English language text using a masked language modeling (MLM) objective.",
    "model_uri": "/path/to/roberta-large-mnli",
    "launcher": "xinference.model.flexible.launchers.transformers",
    "launcher_args": "{\"task\": \"zero-shot-classification\"}",
    "virtualenv": {
        "packages": [],
        "inherit_pip_config": true,
        "index_url": null,
        "extra_index_url": null,
        "find_links": null,
        "trusted_host": null,
        "no_build_isolation": null
    },
    "is_builtin": false
}
請參閱章節 register_custom_model,了解如何透過程式碼或命令列註冊模型。
接下來,在 Web UI 中選擇 啟動模型 / 自訂模型 / 靈活模型 來載入模型。載入流程與其他模型類型相同。
使用命令列時,請記得指定參數 --model-type flexible。
模型成功載入後,我們可以透過以下方式進行推論。
curl -X 'POST' \
  'http://<XINFERENCE_HOST>:<XINFERENCE_PORT>/v1/flexible/infers' \
  -H 'accept: application/json' \
  -H 'Content-Type: application/json' \
  -d '{
    "model": "roberta-large-mnli",
    "args": [
      "one day I will see the world",
      ["travel", "cooking", "dancing"]
    ]
  }'
from xinference.client import Client

client = Client("http://<XINFERENCE_HOST>:<XINFERENCE_PORT>")

model = client.get_model("roberta-large-mnli")

sequence_to_classify = "one day I will see the world"
candidate_labels = ['travel', 'cooking', 'dancing']
model.infer(sequence_to_classify, candidate_labels)
{"sequence":"one day I will see the world","labels":["travel","cooking","dancing"],"scores":[0.9799638986587524,0.010605016723275185,0.009431036189198494]}
ModelScope Pipeline 模型#
ModelScope Pipeline 模型與 Huggingface 模型非常相似,唯一的區別在於使用的 launcher 不同。
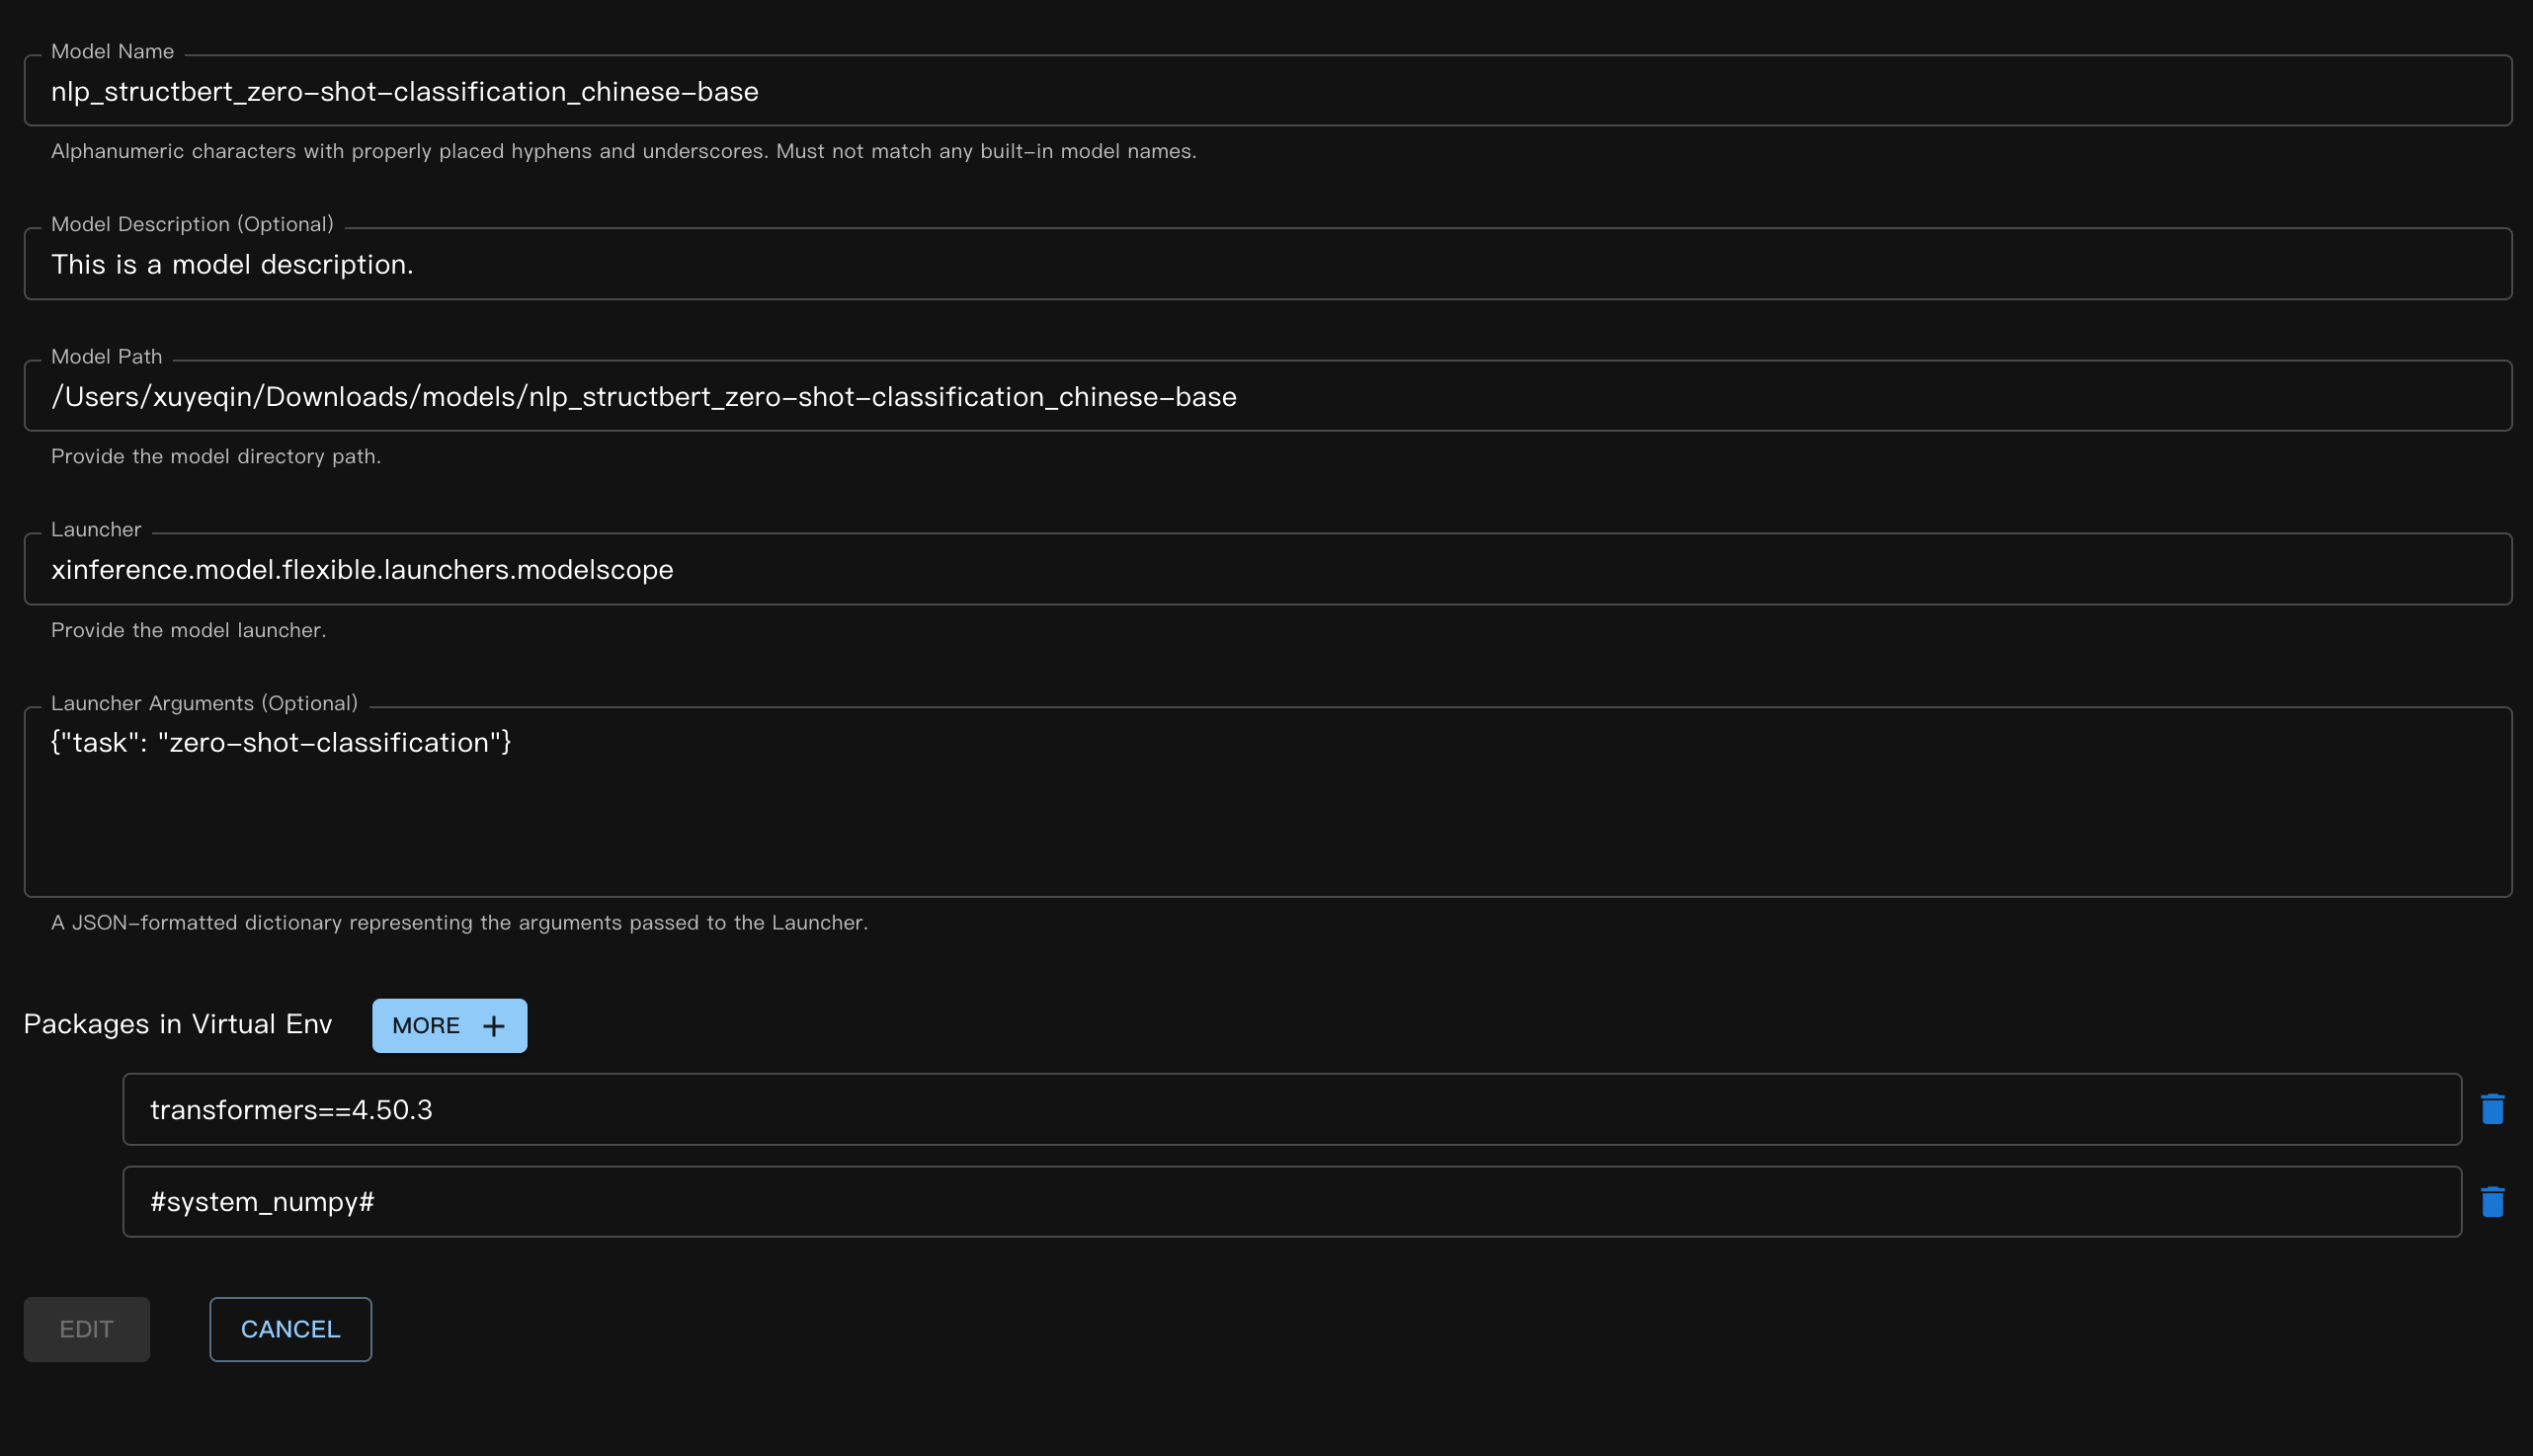
我們以 ModelScope 上的一個零樣本分類模型為例。模型為 iic/nlp_structbert_zero-shot-classification_chinese-base。
這裡我們使用了 Xinference 的模型虛擬環境功能。因為本範例中使用的模型需要 transformers==4.50.3 才能正常運作。為了隔離執行環境,我們在註冊模型時使用了 虛擬環境。
註冊模型時指定自訂套件的語法與一般套件相同,但有一些特殊情況。由於虛擬環境仍基於 Xinference 執行的 Python 解譯器的 site-packages,我們需要明確包含 #system_numpy#。套件名稱用 #system_xx# 包裹,確保虛擬環境建立時與基礎環境一致,否則很容易導致執行階段錯誤。
註冊方式(Web UI):
對應的 JSON 檔案:
{
    "model_name": "nlp_structbert_zero-shot-classification_chinese-base",
    "model_id": null,
    "model_revision": null,
    "model_hub": "huggingface",
    "model_description": "This is a model description.",
    "model_uri": "/Users/xuyeqin/Downloads/models/nlp_structbert_zero-shot-classification_chinese-base",
    "launcher": "xinference.model.flexible.launchers.modelscope",
    "launcher_args": "{\"task\": \"zero-shot-classification\"}",
    "virtualenv": {
        "packages": [
            "transformers==4.50.3",
            "#system_numpy#"
        ],
        "inherit_pip_config": true,
        "index_url": "https://mirrors.tuna.tsinghua.edu.cn/pypi/web/simple",
        "extra_index_url": null,
        "find_links": null,
        "trusted_host": null,
        "no_build_isolation": null
    },
    "is_builtin": false
}
模型推理:
curl -X 'POST' \
  'http://<XINFERENCE_HOST>:<XINFERENCE_PORT>/v1/flexible/infers' \
  -H 'accept: application/json' \
  -H 'Content-Type: application/json' \
  -d '{
    "model": "nlp_structbert_zero-shot-classification_chinese-base",
    "args": [
      "世界那么大,我想去看看"
    ],
    "candidate_labels": ["家居", "旅游", "科技", "军事", "游戏", "故事"]
  }'
from xinference.client import Client

client = Client("http://<XINFERENCE_HOST>:<XINFERENCE_PORT>")

model = client.get_model("nlp_structbert_zero-shot-classification_chinese-base")

labels = ['家居', '旅游', '科技', '军事', '游戏', '故事']
sentence = '世界那么大,我想去看看'
model.infer(sentence, candidate_labels=labels)
{"labels":["旅游","故事","游戏","家居","科技","军事"],"scores":[0.5115892291069031,0.1660086065530777,0.11971458047628403,0.08431519567966461,0.06298774480819702,0.05538458004593849]}%
YOLO#
YOLO 是一種流行的即時目標偵測模型,廣泛應用於影像偵測與影片分析場景。
首先,下載 YOLO 權重。此處我們以 yolov11s.pt 檔案為例。
模型定義的 JSON 檔案:
{
    "model_name": "yolo11s",
    "model_id": null,
    "model_revision": null,
    "model_hub": "huggingface",
    "model_description": "YOLO is a popular real-time object detection model, widely used in image detection and video analysis scenarios.",
    "model_uri": "/Users/xuyeqin/Downloads/models/yolo11s.pt",
    "launcher": "xinference.model.flexible.launchers.yolo",
    "launcher_args": "{}",
    "virtualenv": {
        "packages": [
            "ultralytics",
            "#system_numpy#"
        ],
        "inherit_pip_config": true,
        "index_url": "https://mirrors.tuna.tsinghua.edu.cn/pypi/web/simple",
        "extra_index_url": null,
        "find_links": null,
        "trusted_host": null,
        "no_build_isolation": null
    },
    "is_builtin": false
}
模型推理:
import requests
from PIL import Image
import io
import base64
from xinference.client import Client

client = Client("http://<XINFERENCE_HOST>:<XINFERENCE_PORT>")
model = client.get_model("yolo11s")

url = "https://ultralytics.com/images/bus.jpg"

response = requests.get(url)
response.raise_for_status()

img = Image.open(io.BytesIO(response.content))

buffered = io.BytesIO()
img.save(buffered, format="JPEG")
img_bytes = buffered.getvalue()
img_base64 = base64.b64encode(img_bytes).decode('utf-8')

model.infer(source=img_base64)
[[{'name': 'bus',
   'class': 5,
   'confidence': 0.93653,
   'box': {'x1': 13.9521, 'y1': 227.0665, 'x2': 800.17688, 'y2': 739.13965}},
  {'name': 'person',
   'class': 0,
   'confidence': 0.89741,
   'box': {'x1': 669.89709,
    'y1': 389.82065,
    'x2': 809.58966,
    'y2': 879.65491}},
  {'name': 'person',
   'class': 0,
   'confidence': 0.88205,
   'box': {'x1': 52.37262, 'y1': 397.83792, 'x2': 248.506, 'y2': 905.98212}},
  {'name': 'person',
   'class': 0,
   'confidence': 0.8706,
   'box': {'x1': 222.58685,
    'y1': 405.93442,
    'x2': 345.02032,
    'y2': 859.52789}},
  {'name': 'person',
   'class': 0,
   'confidence': 0.66505,
   'box': {'x1': 0.28522, 'y1': 548.60931, 'x2': 81.25904, 'y2': 871.59076}}]]
編寫自訂靈活模型#
首先,我們實作了一個用於情感評分的簡單自訂啟動器。在此範例中,我們未使用任何實際模型權重,因此 load 函數不執行任何模型載入操作。
# my_flexible_model.py

from xinference.model.flexible import FlexibleModel


class RuleBasedSentimentModel(FlexibleModel):
    def load(self):
        self.pos_words = self.config.get("pos", ["good", "happy", "great"])
        self.neg_words = self.config.get("neg", ["bad", "sad", "terrible"])

    def infer(self, text: str):
        score = 0
        words = text.lower().split()
        for w in words:
            if w in self.pos_words:
                score += 1
            elif w in self.neg_words:
                score -= 1
        return {"score": score}


def launcher(model_uid: str, model_spec: FlexibleModel, **kwargs) -> FlexibleModel:
    # get model path,
    # in this example, we do not use it, so it's empty
    model_path = model_spec.model_uri
    return RuleBasedSentimentModel(model_uid=model_uid, model_path=model_path, config=kwargs)
模型 JSON 定義如下:
{
    "model_name": "my-flexible-model",
    "model_id": null,
    "model_revision": null,
    "model_hub": "huggingface",
    "model_description": "This is a model description.",
    "model_uri": "/path/to/model",
    "launcher": "my_flexible_model.launcher",
    "launcher_args": "{\"pos\": [\"good\", \"happy\", \"great\", \"nice\"]}",
    "virtualenv": {
        "packages": [],
        "inherit_pip_config": true,
        "index_url": null,
        "extra_index_url": null,
        "find_links": null,
        "trusted_host": null,
        "no_build_isolation": null
    },
    "is_builtin": false
}
這裡我們透過傳入自訂的 pos 值擴展了模型。
最後,我們驗證下結果:
from xinference.client import Client

client = Client("http://127.0.0.1:9997")

model = client.get_model("my-flexible-model")

model.infer("I feel nice and am happy today")
{'score': 2}
結論#
Xinference 內建的靈活模型啟動器可以在 Github 找到,歡迎貢獻更多傳統機器學習模型的支援!